/user/dologin/?next=/p/eRFuHP2jNC/
AnonymousUser
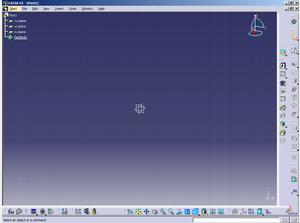
[{"fields": {"is_featured": false, "dir_size": 6960, "igdata": "creating a new product the "product structure tools" toolbar adding existing components adding a new product summary during this lecture, you will learn how to create a new product, add existing components, and create a sub-product. the following slides will demonstrate the creation of a new assembly. select the start menu located at the top of the window. access the mechanical design sub-menu from the start menu. by selecting assembly design from the drop-down menu, you will create a new product file. the extension on the file will be .catproduct. a new product (product1) has just been created. next, we will add an existing component to the product using the product structure tools toolbar.

but first, let's review the product structure tools in detail. let's click and drag the toolbar into the work area. for your convenience, ignite\u00e2\u201e\u00a2 will do this for you. component is the first icon on the product structure tools toolbar. it is used to insert new components and may be thought of as a sub-assembly. product is the second icon on the toolbar. it is used to insert new products and is also known as a sub-assembly. part is the third icon. it is used to insert a new part into the main assembly. existing component is the fourth icon on the toolbar. it is used to insert an existing component, i.e., a .catpart file. existing component with positioning is the fifth icon. it is used to insert an existing component, i.e., a .catpart file while retaining its positioning constraints. replace component is the sixth icon. it is used to replace the selected component, i.e., a .catpart file, with a different one. graph tree reordering is the seventh icon. it is used to change the position of the children of a selected product in the design history tree. generate numbering is the eighth icon. it is used to create a number for all components owning a representation. selective load is the ninth icon. it is used to control which products are loaded and visualized. manage representations is the tenth icon. it is used to manage associations with other model types. the multi-instantiation icon is the last icon on the product structure tools toolbar. it offers a couple of options. let's view these independent of the main toolbar. to view these options in a standalone toolbar, double-click the down arrow beside the multi-instantiation icon. for your convenience, ignite\u00e2\u201e\u00a2 will do this for you. fast multi-instantiation is the first option for creating instances. it repeats components previously defined using the defined command. defined multi-instantiation is the second option for creating instances. it repeats components as many times as desired in a user-specified direction. now that we've finished reviewing the toolbar, let's clean up our work area. first, we'll close the multi-instantiation toolbar. for your convenience, ignite\u00e2\u201e\u00a2 will do this for you. now let's click and drag the product structure tools toolbar back into the toolbar area. for your convenience, ignite\u00e2\u201e\u00a2 will do this for you. now we're ready to add components. the following slides will demonstrate how to add an existing component. select the existing component icon located on the product structure toolbar. confirm the destination of the existing component by selecting the product1 branch. the file selection window now appears. select the piston.catpart from the list of parts. now hold down the ctrl key and select the pin.catpart. the ctrl key allows you to multi-select. to confirm your selection select the open button on the file selection window. notice that both previously-selected .catparts are now displayed in the design history tree. next, we will learn how to add a new sub-product using the product command. you may think of a sub-product as a sub-assembly in which you can place additional .catpart files. begin by selecting the product icon from the product structure toolbar. confirm the destination of the new sub-product by selecting the product1 branch. once selected, a dialog box may appear asking for a part number to be entered. 

please note that in some catia\u00c2\u00ae configurations, the software will automatically generate a default part number for you. this is an option (tools | options menu) that can be changed inside the infrastructure | product structure branch of the options tree on the product structure tab. there is a check box to change automatic part number to "manual input". now that the new sub-product has been added, let's add some existing components to it. since the new sub-product was just created, catia\u00c2\u00ae shows the product3 branch of the design history tree as selected (orange). select the existing component icon. select the connecting rod.catpart from the list of parts. now hold down the ctrl key and select the screw.catpart from the list of parts. select "open" to commit the addition of the existing .catparts into the product3 sub-assembly. notice the "+" symbol will appear to the left of product3. click on it to see your additions to the sub-assembly. congratulations, you have just completed the lecture. to recap, you learned how to create a new product, add existing components and create a new sub-product. <br/>", "overdue_email_after": false, "fail_retake": false, "keywords": "CATIA, Courses, Design, Assembly Design", "fail_action": "", "notification_email": false, "access_token_redemption_count": 0, "completion_type": "", "title": "CATIA V5 - Assembly Workbench - Creating a New Product", "overdue_email_after_text": null, "encoded_id": "eRFuHP2jNC", "is_viewed": true, "overdue_days_email": false, "parent_id": null, "private_views": 0, "fail_email_text": null, "status": "active", "sharing": "public", "description": "<p>During this lesson, you will learn how to create a new product in the CATIA V5 assembly workbench.</br>To see the entire CATIAV5 Assembly Course go to <a href=\"https://www.scatelearning.com/index.php?main_page=product_info&cPath=3_691_5&products_id=2300&zenid=htv8qic3tdv0432un0p47u5lu5\">SCATELearning.com.</a></p></p>", "tags": [24, 25, 103, 223], "price": "0.00", "invite_message": null, "allow_score_reset": true, "igtype": "ignitable", "pass_email_text": null, "fail_popup_text": null, "podcast": false, "public_views": 14302, "notification_email_text": null, "categories": [12, 18], "overdue_days_email_text": null, "pass_action": "", "notification_days_before": null, "access_token": null, "pass_popup_text": null, "pass_level": 0, "author": 252, "completion_date": null, "overdue_summary": false, "fail_retake_auto": false, "avgrating": "0.0", "directory": "284_1201805538875", "date_created": "2008-01-31T13:52:18Z", "access_token_limit": 0}, "model": "Content.ignitable", "pk": 284}]
None

